


A vinyl fence gate serves as both a practical entry point and a finishing touch that enhances your property’s overall appearance. The perimeter entry point determines your backyard’s accessibility and security. A vinyl fence gate serves as this functional focal point, blending aesthetic appeal and structural strength.
Cedar Rustic Fence provides expert vinyl fence gate installation services, ensuring your entryway stays functional and aligned for years to come. Whether you need a simple walk-through gate for your garden or a double-swing drive gate for your driveway, the right combination of style, hardware, and proper installation makes all the difference.
Advantages That Set Vinyl Gates Apart
Vinyl gates outperform traditional wood gates in several ways, especially when compared to other materials.
One of the main advantages of vinyl is its remarkably flexible nature:
- Durability: Vinyl gates resist rot, rust, and fading. They last longer than wood or metal alternatives.
- Low maintenance: Vinyl does not absorb moisture, which means it resists mildew, algae, and mold growth. A quick wash with soap and water keeps your gate looking like new.
- Aesthetic flexibility: Vinyl gates come in a range of colors and designs, allowing you to select a style that complements your home’s overall look.
- Long-term savings: While the initial investment might be higher than wood or chain link, vinyl’s durability means fewer repairs and replacements, saving you money over time.
- Insect immunity: Termites, carpenter ants, and wood-boring beetles ignore vinyl altogether. These pests cause thousands of dollars in damage to wood fences annually across the Chicago area.
Many homeowners find that the lifespan of a vinyl fence far exceeds that of traditional materials, making the gate a permanent landscape fixture.
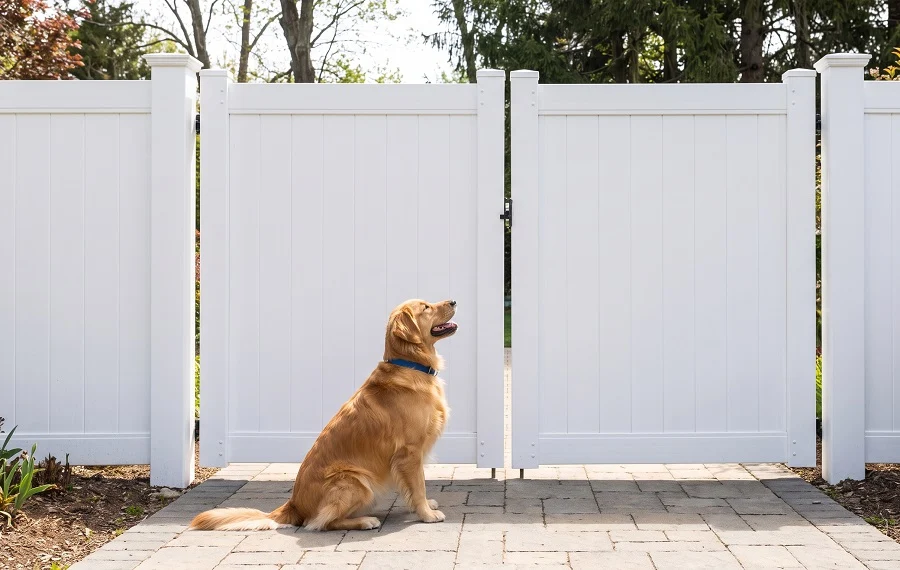
Popular Styles of Vinyl Fence Gates for Every Home
Your gate should match the style of your vinyl fence to create a cohesive look. Depending on your privacy needs and aesthetic preferences, there are several options.
- Privacy gates: Solid panels that block the view altogether, often used for backyards or pool areas.
- Picket gates: Classic spaced slats that allow airflow and visibility while keeping pets and children contained.
- Shadowbox gates: Overlapping boards that offer privacy from a straight-on view but allow air to pass through at an angle.
- Arched or scalloped tops: Decorative transitions that add a custom design element to the entryway.
- Double drive gates: Large openings made of two matching panels to allow vehicle or trailer access to the yard.
You can customize each style’s height and width to fit the unique dimensions of your landscape.
What Is Vinyl Fence Gate Hardware?
Hardware determines how well your gate functions and how long it lasts. A well-built vinyl gate with cheap hardware will sag, stick, and fail within a few years. Quality hardware costs more upfront but delivers decades of smooth operation.
Gate hardware includes all the mechanical components that mount the gate to posts and control its movement: hinges, latches, handles, stops, and bracing. Each component plays a specific role in gate performance.
Types of Hardware
Specific parts handle different aspects of gate movement and security. Every component is designed to meet strict standards for weather resistance and mechanical durability.
- Hinges: Crucial to any gate installation. For vinyl gates, heavy-duty hinges are necessary to support the weight and ensure smooth operation. Stainless steel or galvanized steel hinges are ideal because they resist corrosion and rust.
- Latches: A reliable latch is essential for security. Depending on the type of gate, latches can range from simple spring-loaded designs to more advanced locking mechanisms.
- Gate Posts: Vinyl gate posts must be reinforced to support the gate's weight. Strong, durable posts are essential for ensuring the gate doesn’t sag or lose alignment over time.
- Straps: Vinyl gate straps help secure the gate to the posts, preventing it from swinging too far and causing damage. Proper straps help maintain alignment and extend the gate's lifespan.
High-grade materials prevent the hardware from rust-staining the surfaces, an important factor since painting a vinyl fence to hide stains is generally not recommended.
How to Choose the Right Hardware
You’ll need to factor in material compatibility and functional needs to pick the right parts. The gate’s weight and how often it’s used will dictate which grade of hardware you need.
- Material compatibility: Look for powder-coated stainless steel or high-grade polymers that will not bleed streaks onto the gate.
- Adjustability: Opt for hinges that allow for vertical and horizontal adjustments with a simple wrench.
- Security needs: If you need to lock the gate from both sides, verify the latch system is compatible with double-sided handles.
Choose materials that resist rust, such as galvanized steel or stainless steel. Ensure that the hinges and latches are strong enough to support the gate, especially if it’s larger or heavier than typical residential gates.
#cta_start
Need Help Selecting Your Gate Style?
Looking to install a vinyl fence gate? Cedar Rustic Fence offers professional installation services to ensure your gate is built to last. Contact us today for a consultation!
#cta_end
Vinyl Fence Gates Installation Tips
Success in the installation process depends on a few foundational techniques that keep the structure straight. Follow these steps to achieve a result that looks and functions like a professional job.
1. Accurate Measurements
Before starting the installation, measure the gate and posts thoroughly. Proper measurement ensures the gate will fit perfectly and operate as it’s intended.
2. Set the Gate Posts in Concrete
Gate posts take on significantly more stress than the rest of the fence. To ensure they’re stable, most local fence contractors dig posts rather than driving them. Dig deeper holes and use a higher volume of concrete to prevent the weight of the swinging gate from pulling the post out of alignment.
3. Use High-Quality Tools
Ensure that you have the right tools on hand, including a drill, screwdriver, tape measure, and level. Using the correct tools makes installation smoother and more accurate.
4. Account for Expansion and Contraction
Vinyl can expand and contract with temperature changes. Leave enough space around the posts and hinges to accommodate this natural movement.
When you focus on these details, you’ll have a gate that remains operational for decades. Avoid shortcuts during the initial setup to prevent the need for major repairs in the future.

Common Installation Mistakes to Avoid
Our team commonly sees these errors in DIY gate installations:
- Skipping post reinforcement: Directly screwing hardware into vinyl posts can cause stripping within months.
- Using incorrect post spacing: Posts set too close together force the gate to squeeze into an undersized opening, causing binding. Posts too far apart leave excessive gaps that look unprofessional and allow pets to escape.
- Mounting hinges on vertical stiles: Hinges attached to the gate's vertical frame pieces place stress on the weakest structural points. Always mount hinges to horizontal rails where the gate frame is strongest and reinforced.
- Failing to check plumb and level: Posts that lean or tilt cause gates to swing improperly, so verify plumb in both directions before the concrete sets.
- Installing gates before concrete fully cures: Working with partially cured concrete can shift posts out of position. Wait the full cure time even if the concrete appears solid.
- Over-tightening screws: Vinyl compresses under excessive force. Tighten screws until snug, then stop. Over-tightened screws strip the vinyl, creating loose mounting points that fail prematurely.
- Neglecting swing clearance: Gates need clearance to swing through their arc without hitting fences, landscaping, or structures.
These common errors account for the majority of gate problems that develop within the first year. Most mistakes stem from rushing the process or skipping steps that seem unimportant. The difference between amateur and professional results often comes down to patience and attention to details that aren't obvious until they cause problems.

